How to Recover Lost Photos When They Were Deleted from Mac
 “I took my 5-year-old niece to my grandma’s 75 birthday party last week and she enjoyed it very much. There at the party, she got a chance to know other same aged cousins and they became friends immediately when they met each other. I took many photos at my grandma’s birthday party and planned to send those photos to my sister who’s working far away in China on business. Later when I got home that night, I transferred those photos to my MacBook Air. And when I was editing those photos, an unknown window came out suddenly and I closed it with my first reaction. Then my Mac shut down automatically suddenly and left no signs for telling how did this happen. Then I restarted the Mac and all my photos are gone and nothing could be found in the trash bin. My mind went blank and I got no idea of what to do with this accident. How to recover photos from Mac?”
Overview
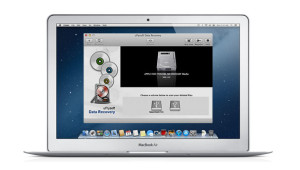
Most Mac photo lost cases are commonly caused by accidental deletion, formatting, partition lost or virus attack. And most Mac users love to use Mac to transfer data and save important files. While most of them have never ever thought sometimes it’s also easy to lost data on Mac. But when these situations occur, many Mac users went panic and could not find an efficient method to solve those similar troubles. Fortunately, an powerful data recovery software–uFlysoft Photo Recovery for Mac is capable to settle those Mac photo lost troubles especially recover photos from Mac easily and quickly without any risks.
How is it possible for recovering the deleted photos
Well, to tell you the truth, when the files were deleted, even the Mac Trash has been emptied, you may consider the files are gone forever and no ways to get them back. Actually it is not. In fact it just frees up the hard drive space for the new files, while its physical data stays on the hard drive just to be overwritten with time. So if you found your favorite photos are lost, stop any operation on your device, this action double the chance of photo recovery.
How to use uFlysoft photo recovery to get lost photos back?
Once you choose uFlysoft Photo Recovery for Mac to help you to get lost files back, there are no more conditions or technical skills are needed, all you need to do is to follow the steps below:
1. Download uFlysoft Mac Photo Recovery on Your Mac first.
2. Select and scan a partition or drive where your lost photo located.
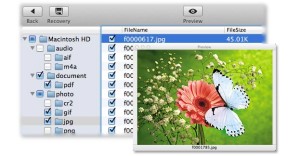
3. Preview the found photo files and click ‘Recovery’, choose the safe path to save the targeted photos to process recovery operation.
Only these 3 steps are needed to process and then you will find the lost photo files will be got back to you again.
Some Tips for You
1. Not only photo files but also video and audio files can be recovered by uFlysoft Photo Recovery, so don’t be confused of its name, it’s an all-in-one media file recovery program.
2. To whom recover the lost files successfully, build a backup for your files right now because this action can help you to protect the data away from any kind of data loss problem.
3. To get more details about Mac photo files recovery, just visit our blog for more details of photo rescue technical support post.
Add a Comment
You must be logged in to post a comment.
