Time Machine-Easily Backing Up Your Data on Your Mac
One of the most important and most overlooked tasks that all computer users should perform on a regular basis is a data backup (Backing up your data can avoid you to jam in the complicated data recovery process or find ways to recover data on Google ’cause this may make you mad). Unfortunately for too many of us, the first time we think about a backup is when our hard drive fails; and then it’s too late.
Time Machine, the backup software included with the Mac OS since OS X 10.5, lets you easily create and maintain current backups of all your important data. It also makes recovering lost files a simple, and dare I say fun, process.
Before you do anything else with your Mac, set up and make use of Time Machine.
Locate and Launch Time Machine
Time Machine needs a hard drive or drive partition to use as the container for all Time Machine data. You can use an internal or external hard drive as your Time Machine backup disc. If you’re going to use an external drive, it should be connected to your Mac and mounted on the desktop before you launch Time Machine.
1. Click the ‘System Preferences’ icon in the Dock.
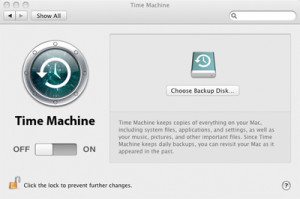
2. Find and click on the ‘Time Machine’ icon, which should be located in the System group of icons.
The first time you use Time Machine, you will need to select a disc to use for your backups. You can use an internal hard drive, an external hard drive, or a partition on one of your existing hard drives.
Although you can select a drive partition, be careful if you choose this option. In particular, avoid choosing a partition that resides on the same physical disc as the data you will back up. For example, if you have a single hard drive (perhaps in a MacBook or a Mini) that you have partitioned into two volumes, I don’t recommend using that second volume for your Time Machine backup. Both volumes reside on the same physical drive; if the drive should fail, there’s a high probability that you’ll lose access to both volumes, which means you’ll lose your backup as well as your original data. If your Mac has a single internal hard drive, I recommend using an external hard drive as your backup disc.
Select Your Backup Disc
1. Click the ‘Choose Backup Disc’ button.
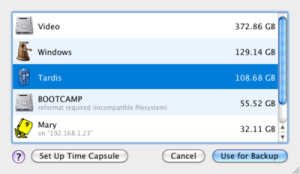
2. Time Machine will display a list of discs you can use for your backup. Highlight the disc you want to use, and then click the ‘Use for Backup’ button.
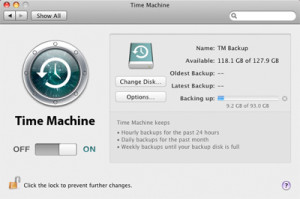
Time Machine is ready to go, and will begin its first backup in a few minutes. Before you turn Time Machine loose, you may want to configure one or two options. To prevent the first backup from beginning, click the ‘Off’ button.
Configure Time Machine Options
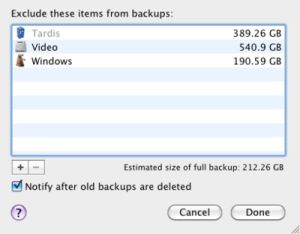
Click the ‘Options’ button to bring up a list of items that Time Machine shouldn’t back up. By default, your Time Machine backup disc will be the only item on the list. You may want to add other items to the list. Some common items that shouldn’t be backed up are discs or folders that hold Windows operating systems, because of the nature of how Time Machine works. Time Machine initially makes a backup of your whole computer, including the operating system, software applications, and your personal data files. It then makes incremental backups as changes are made to files.
Windows data files used by Parallels and other Virtual Machine technology look like one big file to Time Machine. Sometimes, these Windows VM files can be very large, as much as 30 to 50 GB; even small VM Windows files are at least a few GB in size. Backing up large files can take a long time. Because Time Machine backs up the whole file every time you use Windows, it will also back up the whole file every time you make a change within Windows. Opening Windows, accessing files in Windows, or using an application in Windows can all generate Time Machine backups of the same large Windows data file. A better option is to eliminate these files from your Time Machine backup, and instead back them up using the backup tools available in the VM application.
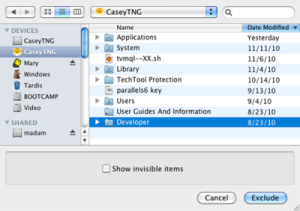
To add a disc, folder, or file to the list of items that Time Machine shouldn’t back up, click on the plus (+) sign. Time Machine will display a standard Open/Save dialog sheet that lets you browse through the file system. Since this is a standard Finder window, you can use the sidebar for quick access to frequently used locations.
Navigate to the item you want to exclude, click on it to select it, and then click the ‘Exclude’ button. Repeat for each item you want to exclude. When you’re finished, click the ‘Done’ button.
You’re ready to start Time Machine and create your first backup. Click the ‘On’ button.
How easy was that? Your data is now being backed up safely to the disc you designated earlier.
Time Machine keeps:
- Hourly backups for the last 24 hours
- Daily backups for the past month
- Weekly backups until your backup disc is full
Once your backup disc is full, Time Machine will overwrite the oldest backups, to ensure that your current data is protected.
If you ever need to recover a file, folder, or your whole system, Time Machine will be ready to assist. More details about your Mac info you can visit our offcial website by visiting this or clicking uFlysoft studio.
