Some Tips For Mac: Disable Useless Mac Self Start-Up Items
 Mac users may have such feelings: their Macs slow down the longer they own it. Actually, we can apply some simple methods to reduce the system resource consumption and improve the operating efficiency of the system, such as manually disabling useless Adobe startup service items etc. If you have the same problem, you might as well have a look at the approach shared by iPhone fan zczyzi.
- Find and delete the files related to “Adobe” via the following path. Most of these startup items are related to Adobe’s auto-update, according to this iPhone fan.
~/Library/LaunchAgents
/Library/LaunchAgents
/Library/LaunchDaemons
/System/Library/LaunchAgents
/System/Library/LaunchDaemons
- Enter System Preferences, close Core Sync and Core Sync Helper in “Extension”.
- Go to /Applications/Utilities/Adobe Creative Cloud, delete folders of CCLibrary, CCXProcess and CoreSync.
If you can’t remove it, force to exit the process of CCLibrary.app, CCXProcess.app and CoreSync.app from the “Finder – application – utility – Activity Monitor” and then execute delete. iPhone fan zczyzi says CCLibrary.app is associated with Adobe’s Library Utilities, while CCXProcess.app and CoreSync.app is Synchro Function process of Adobe Creative Cloud, these are wasting system resources as a permanent resident in background.
- Restart.
How To Create An Encrypted Folder In macOS?
Recently, EricZhan, a friend from WeiPhone shares an approach to create an encrypted folder on macOS devices. He expresses, this approach comes with the system and is very secure, and you don’t have to pay for third-party soft-wares. Let’s check out the details.
- Firstly, open the disk utility. We can find it either in Spotlight or in the “application – utility”.
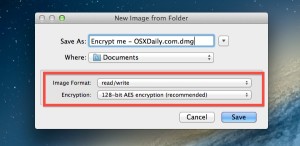
- Then click “file – new image – blank image” on the upper-left menu bar.

- Modify the name and size of the encrypted folder in the pop-up window.
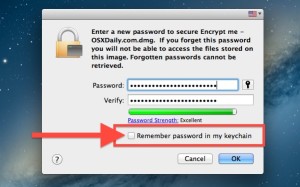
- Select 128-bit AES encryption in the “encryption” option, and then we will see an interface to input and verify the password.

- Click “select” and then click “save” to generate a DMG file.
- Double-clicking on the file brings up a window that your password needs to be entered.
- Input password and open the DMG file, we will see a system automatic loading folder, which files that need to be encrypted can be put in.
In addition, iPhone fan EricZhan also gives a way to adjust the size of the encrypted folder:
Open the disk utility again, and then select “image-resize” on the menu bar.
Then choose the DMG file generated earlier, you will see a resize window, input the number you want, and click “resize”.
Read More:
How to Recover Word Document on Mac?
