Guide to Recovering Photos on Mac
Who doesn’t take photos? In an era when documenting your life has become second nature, photos make for a critical aspect many rely on. There’s one screen, one battery, one software and one system on chip in your smartphone but two cameras. There are countless software applications that offer editing, filters, effects, storage and whatnot all surrounding one and only one thing – photos – for your selfies, panoramas, portraits, HDR images and more.
EMOTIONAL EFFECT OF LOSING PHOTOS
We tend to develop emotional connection with the memories we create and photos are reminder of those moments. A way to relive the happier times and soak in the depths of nostalgia. That’s why losing a bunch of meaningful photos can be quite saddening. There’s so much emotional value placed in those memories that you don’t deserve to bear the consequences of accidental deletion, virus attack, hardware failure or software malfunction. Many times things are out of user’s control and he ends up being helpless in the face of adverse circumstances.
However, such situations aren’t as hopeless as they may appear to be in the beginning as there are ways to recover your photos on your Mac.
HOW TO RECOVER PHOTOS ON MAC
OS X itself offers two different ways to recover photos without much hassle.
Recovering Photo from Recently Deleted Album
If you’ve accidentally deleted a photo from your Mac, you’re in luck. OS X doesn’t permanently delete the file and keeps it in a folder named Recently Deleted for 30 days. If it’s not been a month since you accidentally deleted your photo, you can simply go to the folder and restore it from there.
Recovering Deleted Photos on Mac from iPhoto/Photos
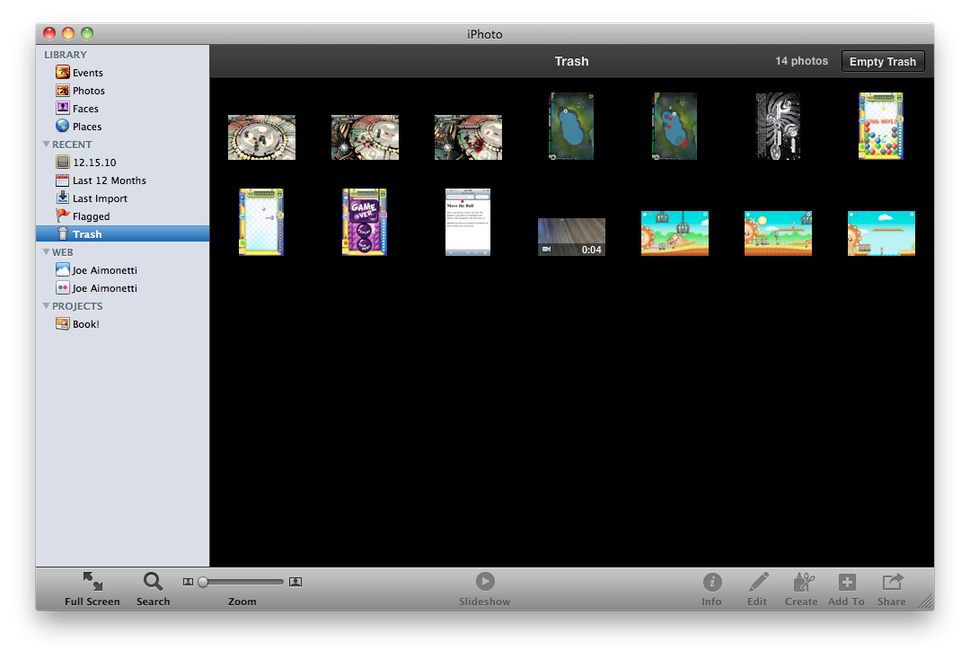
In case you are a user of iPhoto which has recently been renamed to Photos, the image would land in a unique folder named iPhoto Trash instead of the usual Trash folder where all deleted files go. You can recover the photo(s) following these simple steps:
1. Run the iPhoto application.

2. Find “Trash” in the sidebar and click on it.
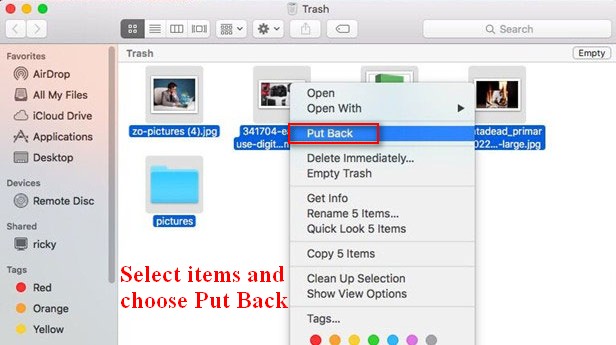
3. Find the photo(s) you want to recover and use the combination of Control and Click to summon a menu from which select “Put Back”

4. Check Photos to ensure your image has been restored.
If the above options aren’t working or you’ve damaged your drive then you’ll have to rely on best photo recovery software on Mac named uFlysoft.
Recovering Deleted Photo Using uFlysoft
You should note that uFlysoft is a versatile software that can recover all types of data including all formats of photos such as JPG, TIF, PNG, BMP, GIF, DNG, PSD and RAW files. It’s easy and convenient to get the assistance of this excellent utility.
1. Download uFlysoft and install it on your system.
2. Run the application.
3. Scan the partitions to find out all the files that’ve been restored.
4. Select the photos and other files you might want to recover and save them on another media.
FINAL WORD
There’s no alternative to proactive planning and multiple backups. When it comes to the dearest memories of your life, you can’t be cautious enough. Use cloud services and external media to keep multiple backups of your most important photos. However, if you do land in a spot of bother where you need to recover photos on Mac, you can always put your faith in uFlysoft data recovery utility.

