Digital Image Recovery Software-Recover Image Data with Ease
About Digital Image
Digital imaging or digital image acquisition is the creation of digital images, typically from a physical scene.  The term is often assumed to imply or include the processing, compression, storage, printing, and display of such images. The most usual method is by digital photography with a digital camera but other methods are also employed.
Digital imaging was developed in the 1960s and 1970s, largely to avoid the operational weaknesses of film cameras, for scientific and military missions including the KH-11 program. As digital technology became cheaper in later decades it replaced the old film methods for many purposes.
With digital images, we can share our favorite pictures wherever whenever we want, it brings us more convenience. But we also have to face a big problem, the data loss of digital image. Maybe we will feel upset when we lose them, but fortunately we can perform digital image recovery. “Is it possible to do it? They all had gone!” Maybe you will ask this question. Take it easy; let’s just keep on reading this article.
Why Can Digital Image Deleted be Recovered?
When a digital image or a file is deleted from your store device, it is NOT really deleted. It is simply removed from the file directory in the folder. Even though you can no longer see the file in the folder, its contents still exist 100% intact at this point. As long as the file remains there, you can easily recover it in its entirety.
So the first thing you should do when you want to recover deleted file is looking for it in the Recycle Bin. If it's there, you can recover deleted files from the Recycle Bin by just using the "Restore" option which will move it back to its original location.
If you empty the Recycle Bin or delete a file using other method which bypassed the Recycle Bin such as "Shift+Del", although you cannot see the file in Recycle Bin, the file is still not really deleted. The file no longer exists as far as the operating system is concerned and the space it occupied becomes available for re-use by other files. But the disk space does not get re-used straight away, so the data that the deleted file contained will stay on your hard drive for some time to come.
Method to Recover Digital Image
After reading the reason why we can recover the digital image, it’s time to introduce the high effective recovery program to you-uFlysoft Photo Recovery for Win.
With this powerful and high reputation recovery tool, what you need to do is take a cup of tea and some cookies, sit in front of your computer and do a few click jobs follow the easy-to-use “3-step” recovery operation. Without further ado, let’s check it out.
1. Download and install the uFlysoft Photo Recovery on your computer. Turn on the application, choose the drive which your digital image were store before, click "Scan" button to SCAN hard drive automatically. (To perform data recovery operation on Mac PC, users can use uFlysoft Data Recovery for Mac.)
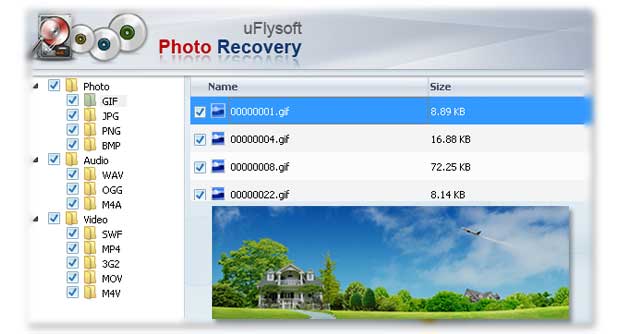
2. After scanning is finished, you will find lots of image files you deleted are all found and recoverable. You can choose the format of your digital image to preview and decide if you want to recover it or not.
3. Once you choose the image and after confirmation, click the "Recover" button, then after a few minutes, the photos will come back to you.

Tips:
As a good recovery tool, uFlysoft Photo Recovery can do more for you, it is not only an image recovery program, but it also can act as a video and audio files recovery tool for you. In a word, it’s a good idea for you to have such an all-in-one media data recovery program.
